How to Start a Workout
Everything you need to know to successfully record a live workout at the pool is here. We got you!
Whether you’re a coach running a group practice or a swimmer tracking your performance, starting a workout with TritonWear is quick and easy when you know the steps.
This guide focuses on what a smooth session looks like, then wraps up with troubleshooting steps and best practices if things don’t go as expected.
All you need:
- A compatible device (iPad or phone),
- The TritonWear app installed and Bluetooth enabled.
- Your Triton unit(s) fully charged.
- (Optional) Any Polar Verity Sense heart rate monitors you plan to use.
Everything must be set up ahead of time in the Account Management page, once that’s done, you’re ready to go.
Quick Navigation
Use these shortcuts to jump to the section that fits your role or needs:
Start a Workout as a Coach
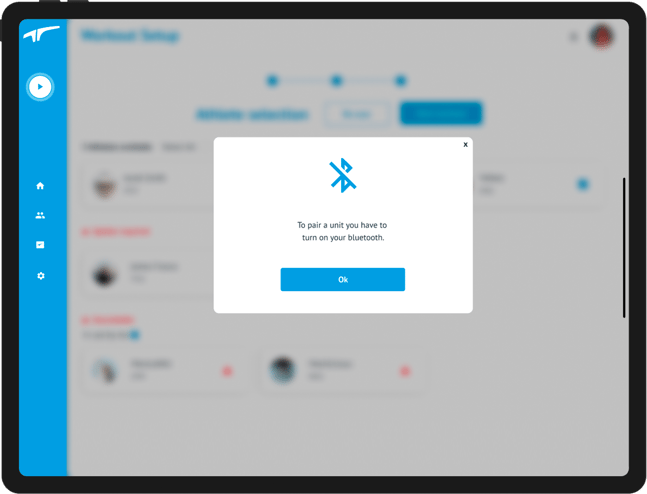
1. Open the AppLaunch the TritonWear app on your iPad with Bluetooth enabled and tap the play button. If Bluetooth is not enabled, you will see this warning:
2. Choose Pool Length and Role:
- Select the correct pool length—it determines how metrics are calculated.
- And set your role as coach, then hit next.
📝Note: Custom pool lengths must be between 15 and 100 meters (16.4 to 109.3 yards), and laps with fewer than 4 strokes may not yield any metrics.
⚠️You won’t be able to change this later, so make sure it’s accurate.
🤓Only users with Coach or Admin roles can start group workouts.

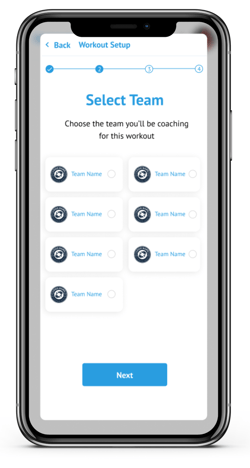
3. Select Your Team or Group:
Choose the team or group associated with the workout to ensure it appears on their feed after practice. Then, hit next.

4. Set Intensity Plan
Choose a training focus and adjust Volume and Rest using the sliders. The app will alert you if your settings exceed the recommended ranges.
👉 You can learn more about how to set your planned intensity here.

Once you set your intensity plan and hit Next, the app will automatically scan for nearby devices.
To connect:
- All Triton Units and Polar Verity Sense heart rate monitors must be turned on
- and placed next to the iPad to start the workout.
- Then, select the swimmers you'd like to include by tapping the checkboxes or choosing "Select all."
⚠️ If a swimmer’s Triton Units is there but their name isn’t showing up in the list, they probably haven’t accepted the team invite. Have them check their email and accept it so you can include them in the workout.
❤️Heart Rate Monitors are optional. If your team uses them and they’re properly assigned, they’ll connect just like the Triton Units.
.png?width=670&height=503&name=Start%20a%20workout%20process%20(1).png)
- Tap Start Workout to begin. The play button will turn into a pulsing record button, and each athlete's tiles will show connection progress.
-
Once a unit connects, the light will turn green, and the tile will display "Start Swimming."
⚠️🏊♂️Don’t start swimming until the tile says Start Swimming. The unit must be fully connected first.


The athlete card will stay on Start Swimming until the first lap is recorded, after which it will switch to the regular card and continue to show live data as it comes in after each lap and rep.
💡Once the workout has started, everything is locked and loaded, live data will flow in, and you can dig into workout details in real time. But heads up: you won’t be able to activate, assign, or update units while the practice is running.
Add Swimmers Mid-Workout
To add a late swimmer, tap the add swimmer icon ![]() , make sure their device(s) are turned on and follow the prompts. This will add them to the workout without disruption.
, make sure their device(s) are turned on and follow the prompts. This will add them to the workout without disruption.

Starting a Workout as a Swimmer
If you’re a swimmer tracking your performance, here’s how to get started.
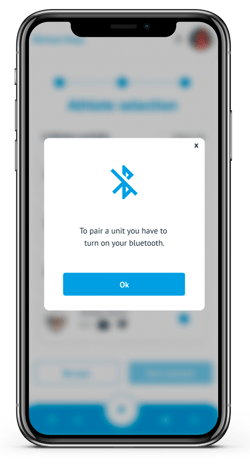
1. Open the AppLaunch TritonWear on your phone with Bluetooth enabled and tap the play button. If Bluetooth is not enabled, you will see this warning.
2. Set Pool Length and Role:
-
-
Choose your pool length and select the Swimmer role.
-

📝Note: Custom pool lengths must be between 15 and 100 meters (16.4 to 109.3 yards), and laps with fewer than 4 strokes may not yield any metrics.
⚠️You won’t be able to change this later, so make sure it’s accurate.
🤓Only users with Coach or Admin roles can start group workouts. Swimmers selecting "Coach" will still only be able to start workouts for themselves.
3. Assign a Team (Optional):
Next, select the team you want to associate this workout with and tap Next. Otherwise, it will be saved to your personal feed.
🤓If you’re not part of a team, this step will be skipped.
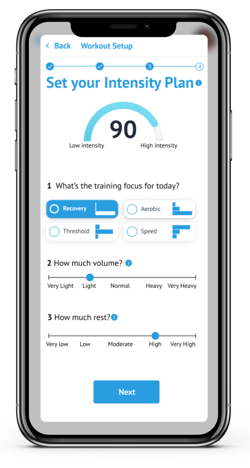
4. Set Your Intensity Plan
Choose your training focus and adjust Volume and Rest using the sliders. You’ll get a warning if your settings exceed recommended ranges.
👉 You can learn more about how to set your planned intensity here.
5. Connect to Your Device(s)
Ensure your Triton Unit and Polar Verity Sense (if applicable) is powered on and nearby. The app will:
-
Automatically detect and connect to your assigned Triton Unit
-
If available, also connect to your assigned HRM (optional)
⚠️ Triton units and HRMs must be assigned to you in Account Management to connect.
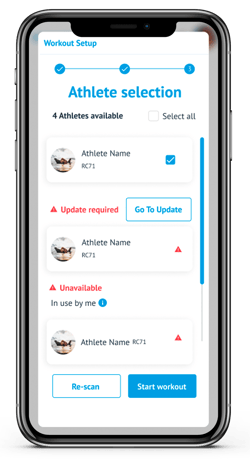
If your unit requires an update, it will appear under "update required."
If you have a stable internet connection, you can tap  to update it on the spot before starting the workout. If you choose not to, you will not be able to start the workout.
6. Start the Workout
Tap Start Workout. Your tile will show a connection status, and once ready, will display "Start Swimming."
⚠️🏊♂️Don’t start swimming until the tile says Start Swimming. The unit must be fully connected first.

Once your first lap is complete, the card will update and begin showing live metrics after each lap and rep.
Pro Tips for Running a Smooth Workout
Before hitting start, make sure everything is good to go:
-
Disconnect other Bluetooth devices (e.g. headphones) to avoid interference.
-
If updates don’t show, log out and back in to force a sync.
-
Stay in the app during the workout, avoid backgrounding.
- To maintain a Bluetooth connection with your devices( Tritons and Polars), keep your phone or iPad poolside, on deck or in a backpack.
Troubleshooting
If a Unit Doesn't Connect
You may see a message: "Hmm, this unit needs your help." That means the app tried 5 times but couldn’t connect. Try this:
- Turn the unit off.
- Wait a few seconds, then turn it back on.
- Tap Retry in the app.
If it still doesn’t work, you can remove the unit from the workout and continue with the rest of the group.
Firmware Updates
- Athletes whose Triton units require a firmware update will appear under an “Update Required” heading.
- If you have a stable internet connection, tap
 these units before starting.
 - If you choose not to update, you won’t be able to include these units in the session.
👉 You cannot update a unit on the same device where a workout is active.
Unavailable Units
Below the athlete list, you may see units categorized as unavailable. Here’s what the headings mean:
- In Use by You: The unit is already part of another workout on this device.
- In Use by Others: The unit is currently part of a workout on another device.
- No Access: The unit is not associated with the selected team.
- Unknown: The app doesn’t recognize the unit.
Want more?
Learn how to change the metrics on your tiles for a more immersive live activity experience.

%2011.11.31%20a.m.%20(1).png?width=400&height=257&name=Captura%20de%20pantalla%202024-11-26%20a%20la(s)%2011.11.31%20a.m.%20(1).png)